Review, Research, and Discussion
- Describe use cases for useMemo() and useReducer()
useReducer is used to store and update states, just like the useState Hook. It accepts a reducer function as its first parameter and the initial state as the second.
useMemo is a React hook that memorizes the output of a function. That is it. useMemo accepts two arguments: a function and a list of dependencies. useMemo will call the function and return its return value.
- Why do custom hooks need the use prefix?
Custom Hooks are JavaScript functions whose names are prefixed with the word use. A custom Hook is a normal function but we hold them to a different standard. By adding the word use to the beginning, it lets us know that this function follows the rules of Hooks.
- What do custom hooks usually do?
Custom hooks allow us to have cleaner functional components, remove logic from the UI layer, and prevent code duplication by bringing common use cases to reusable hooks.
- Using any list of custom hooks, research and name one that you think will be useful in your applications
react-fetch-hook seems really powerful and will surely come in handy for my projects and applications.
Making ajax calls is like the most basic and most performed task for a frontend developer. And the React community is quick enough to create a hook for this purpose too. Installation:
npm i react-fetch-hook
Usage:
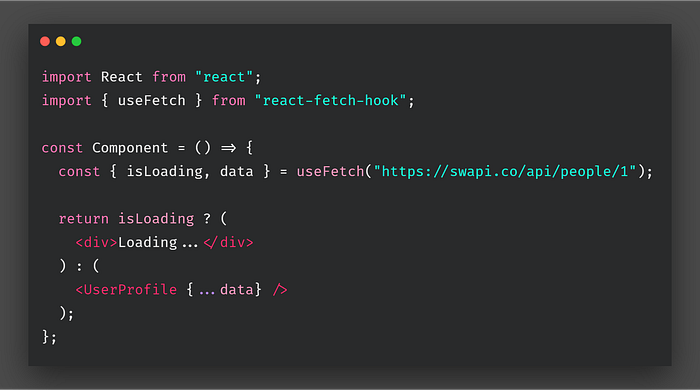
Not much to say, useFetch hook gets us the data and the isLoading state.
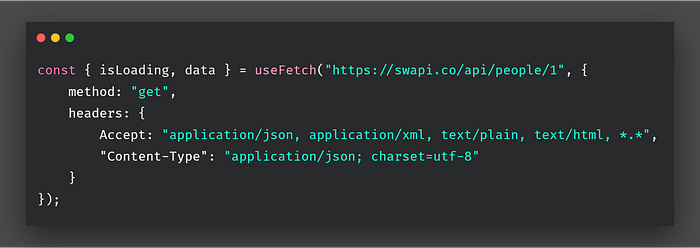
We can also provide the required options object to the hook.
Github repository for useFetch hook
- Describe how a hook that fetches API data might work
Fetch API
Fetch API is a promise-based JS API, used for making asynchronous HTTP requests in a browser similar to XMLHttpRequest. It’s standardized and supported by all modern browsers, except for IE. In case IE needs to be covered as well, then there’s a polyfill released by Github.
- What are the prerequisites?
Since we’re keeping it simple and leaving the focus on fetching data, instead of React, we’ll just use the Create React App. To install it, use the next commands in terminal:
    npx create-react-app my-app
    cd my-app
    npm start
Fetching data
First, we’re going to import stuff we’re going to use and create a function.
    import React, {useState, useEffect} from "react"

    const App = () => {
    return <div> Fetched data will be displayed here</div>
    }
The next step is to add a useState hook and to define the name of the state - in our case, that’s data. Then, we define the function we’ll use later on to update the state - setData.
In the end, we set the initial value of our state, which is null</strong in our case.
    import React, {useState, useEffect} from "react"

    const App = () => {
    const [data, setData] = useState(null)
    return <div> Fetched data will be displayed here</div>
    }
After adding our useState hook to handle the data, the next step is to make the fetch request.
First, we’re going to create a constant fetchURL, in case we need to reuse our endpoint to fetch other data, except for posts. You can check here what else you can fetch and play with.
Then we create an arrow function named getData and inside of that function, we’re going to call fetch(). Inside fetch, we’re going to provide a previously defined constant fetchURL and add /posts, since we’re fetching posts.
    import React, {useState, useEffect} from "react"
    const fetchURL = "https://jsonplaceholder.typicode.com"
    const App = () => {
    const [data, setData] = useState(null)
    const getData = () =>
        fetch(`${fetchURL}/posts`)
        .then((res) => res.json())

    return <div> Fetched data will be displayed here</div>
    }
After defining our request, it’s time to bring in useEffect. Then we’re calling our getData() function inside of the useEffect hook to set it to the local state.
At the end of useEffect, we added an empty array [], because that way, useEffect runs only once.
    import React, {useState, useEffect} from "react"
    const fetchURL = "https://jsonplaceholder.typicode.com"
    const App = () => {
    const [data, setData] = useState(null)
    const getData = () =>
        fetch(`${fetchURL}/posts`)
        .then((res) => res.json())

    useEffect(() => {
        getData().then((data) => setData(data))
    }, [])
    return <div> Fetched data will be displayed here</div>
    }
At this point, we have everything ready to show the data inside our div. We’re going to use a map() function to iterate through this array of data.
In case you’re not familiar with the map you can read the full documentation here. Once we iterate over the data, we can access posts’ titles, which we’re calling by item.title.
    import React, { useEffect, useState } from 'react'

    const App = () => {
    const [data, setData] = useState(null)
    const fetchURL = "https://jsonplaceholder.typicode.com"
    const getData = () =>
        fetch(`${fetchURL}/posts`)
        .then((res) => res.json())

    useEffect(() => {
        getData().then((data) => setData(data))
    }, [])

    return (
        <div>
        {data?.map((item) =>
            <ul>
            <li>{item.title}</li>
            </ul>
        )}
        </div>
    )
    }

    export default App;
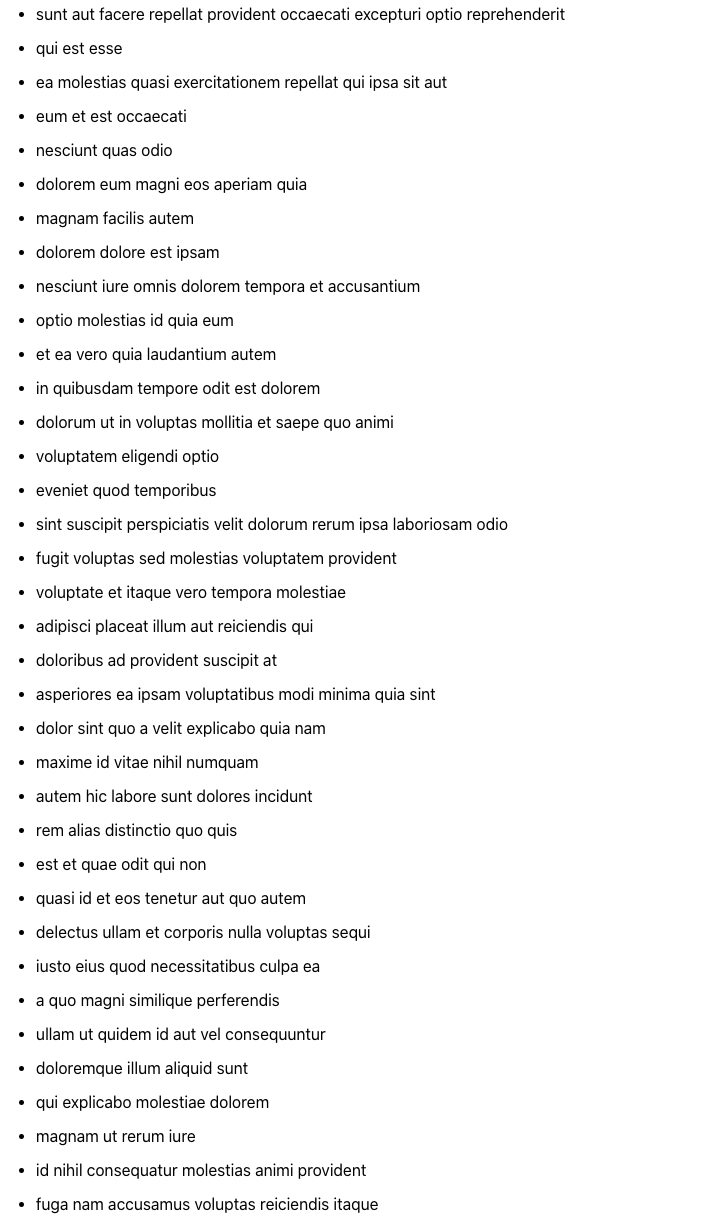
If you did exactly as written in the post, your browser should, in the end, look like this:
Document the following Vocabulary Terms
- reducer: A reducer is a function that determines changes to an application’s state. It uses the action it receives to determine this change. We have tools, like Redux, that help manage an application’s state changes in a single store so that they behave consistently.
context api
When to Use Context
Context is designed to share data that can be considered “global” for a tree of React components, such as the current authenticated user, theme, or preferred language. For example, in the code below we manually thread through a “theme” prop in order to style the Button component:
    class App extends React.Component {
    render() {
        return <Toolbar theme="dark" />;
    }
    }

    function Toolbar(props) {
    // The Toolbar component must take an extra "theme" prop  // and pass it to the ThemedButton. This can become painful  // if every single button in the app needs to know the theme  // because it would have to be passed through all components.  return (
        <div>
        <ThemedButton theme={props.theme} />    </div>
    );
    }

    class ThemedButton extends React.Component {
    render() {
        return <Button theme={this.props.theme} />;
    }
    }
Using context, we can avoid passing props through intermediate elements:
    // Context lets us pass a value deep into the component tree// without explicitly threading it through every component.// Create a context for the current theme (with "light" as the default).const ThemeContext = React.createContext('light');
    class App extends React.Component {
    render() {
        // Use a Provider to pass the current theme to the tree below.    // Any component can read it, no matter how deep it is.    // In this example, we're passing "dark" as the current value.    return (
        <ThemeContext.Provider value="dark">        <Toolbar />
        </ThemeContext.Provider>
        );
    }
    }

    // A component in the middle doesn't have to// pass the theme down explicitly anymore.function Toolbar() {
    return (
        <div>
        <ThemedButton />
        </div>
    );
    }

    class ThemedButton extends React.Component {
    // Assign a contextType to read the current theme context.  // React will find the closest theme Provider above and use its value.  // In this example, the current theme is "dark".  static contextType = ThemeContext;
    render() {
        return <Button theme={this.context} />;  }
    }
Before You Use Context
Context is primarily used when some data needs to be accessible by many components at different nesting levels. Apply it sparingly because it makes component reuse more difficult.
If you only want to avoid passing some props through many levels, component composition is often a simpler solution than context.
For example, consider a Page component that passes a user and avatarSize prop several levels down so that deeply nested Link and Avatar components can read it:
    <Page user={user} avatarSize={avatarSize} />
    // ... which renders ...
    <PageLayout user={user} avatarSize={avatarSize} />
    // ... which renders ...
    <NavigationBar user={user} avatarSize={avatarSize} />
    // ... which renders ...
    <Link href={user.permalink}>
    <Avatar user={user} size={avatarSize} />
    </Link>
It might feel redundant to pass down the user and avatarSize props through many levels if in the end only the Avatar component really needs it. It’s also annoying that whenever the Avatar component needs more props from the top, you have to add them at all the intermediate levels too.
One way to solve this issue without context is to pass down the Avatar component itself so that the intermediate components don’t need to know about the user or avatarSize props:
    function Page(props) {
    const user = props.user;
    const userLink = (
        <Link href={user.permalink}>
        <Avatar user={user} size={props.avatarSize} />
        </Link>
    );
    return <PageLayout userLink={userLink} />;
    }

    // Now, we have:
    <Page user={user} avatarSize={avatarSize} />
    // ... which renders ...
    <PageLayout userLink={...} />
    // ... which renders ...
    <NavigationBar userLink={...} />
    // ... which renders ...
    {props.userLink}
With this change, only the top-most Page component needs to know about the Link and Avatar components’ use of user and avatarSize.
This inversion of control can make your code cleaner in many cases by reducing the amount of props you need to pass through your application and giving more control to the root components. Such inversion, however, isn’t the right choice in every case; moving more complexity higher in the tree makes those higher-level components more complicated and forces the lower-level components to be more flexible than you may want.
You’re not limited to a single child for a component. You may pass multiple children, or even have multiple separate “slots” for children, as documented here:
    function Page(props) {
    const user = props.user;
    const content = <Feed user={user} />;
    const topBar = (
        <NavigationBar>
        <Link href={user.permalink}>
            <Avatar user={user} size={props.avatarSize} />
        </Link>
        </NavigationBar>
    );
    return (
        <PageLayout
        topBar={topBar}
        content={content}
        />
    );
    }
This pattern is sufficient for many cases when you need to decouple a child from its immediate parents. You can take it even further with render props if the child needs to communicate with the parent before rendering.
However, sometimes the same data needs to be accessible by many components in the tree, and at different nesting levels. Context lets you “broadcast” such data, and changes to it, to all components below. Common examples where using context might be simpler than the alternatives include managing the current locale, theme, or a data cache.
References
-
context api Read full article
-
react context links Check it out
-
hooks and context example Check it out